Okta
Register Masttro as an OpenID Connect app integration in your Okta organization. You need an Okta administrator account that can create applications.
Create the app integration
-
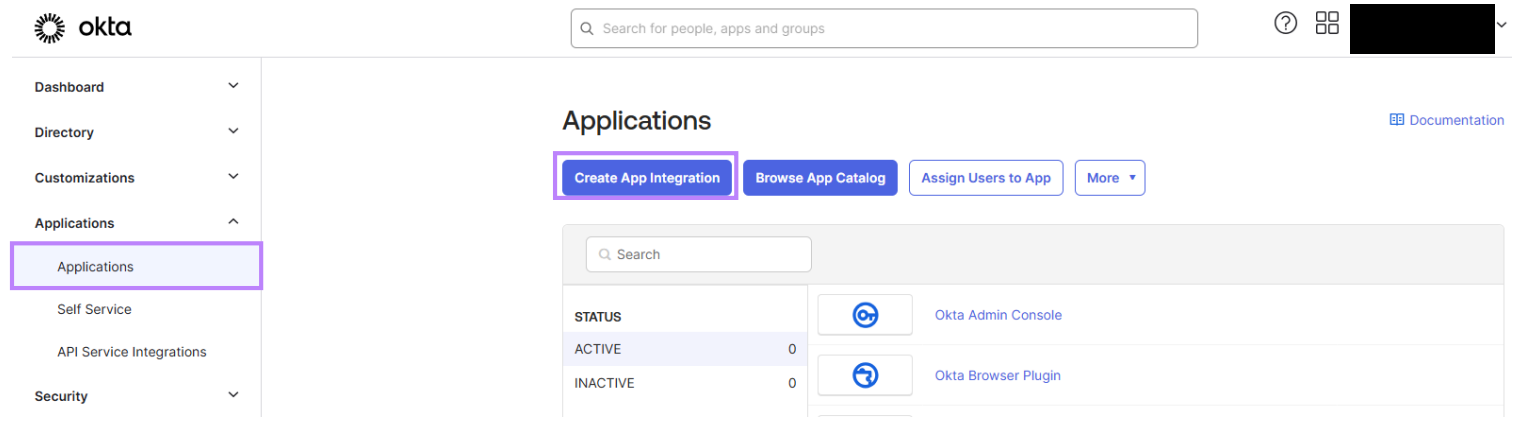
In the Okta Admin Console, open Applications → Applications and click Create App Integration.
-
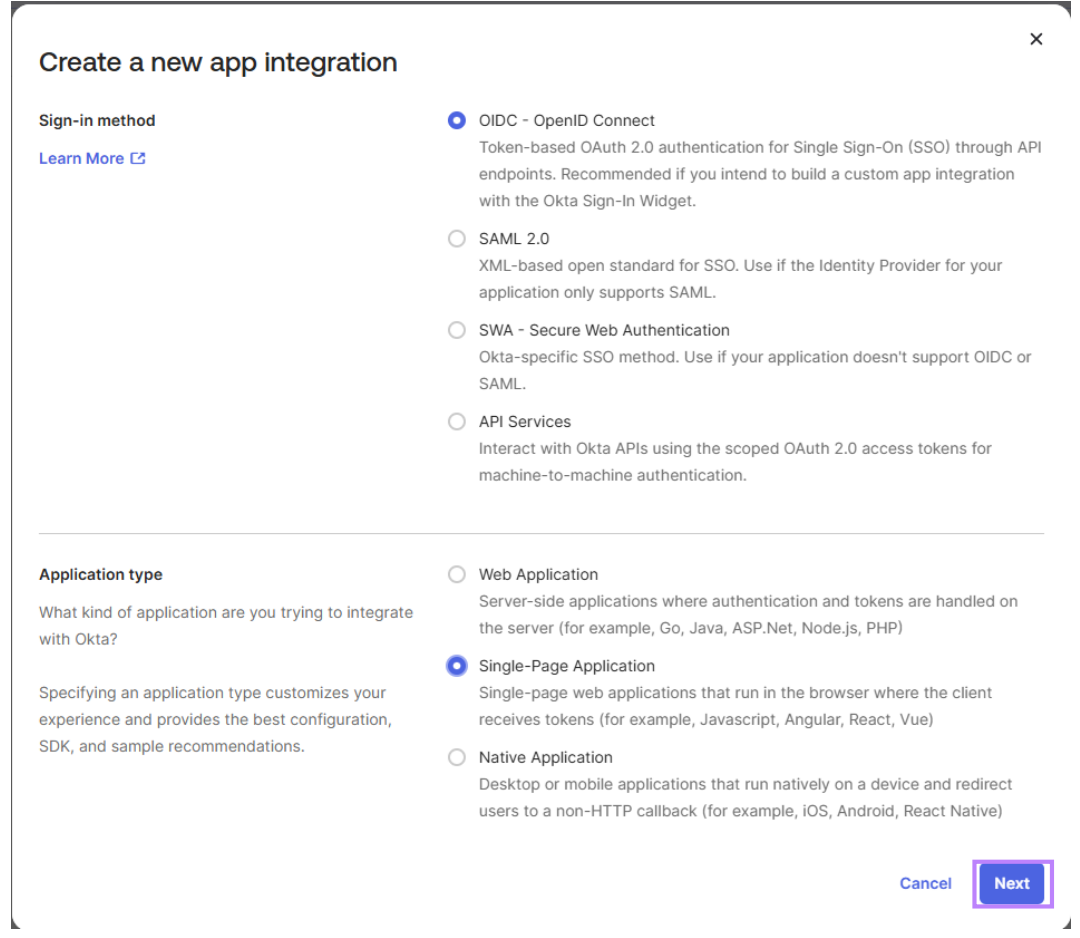
Select sign-in method OIDC - OpenID Connect and application type Single-Page Application, then click Next.
-
Under General Settings:
- App integration name: for example
Masttro. A logo is optional. - Grant type: Authorization Code (Masttro uses PKCE). Leave DPoP unchecked.
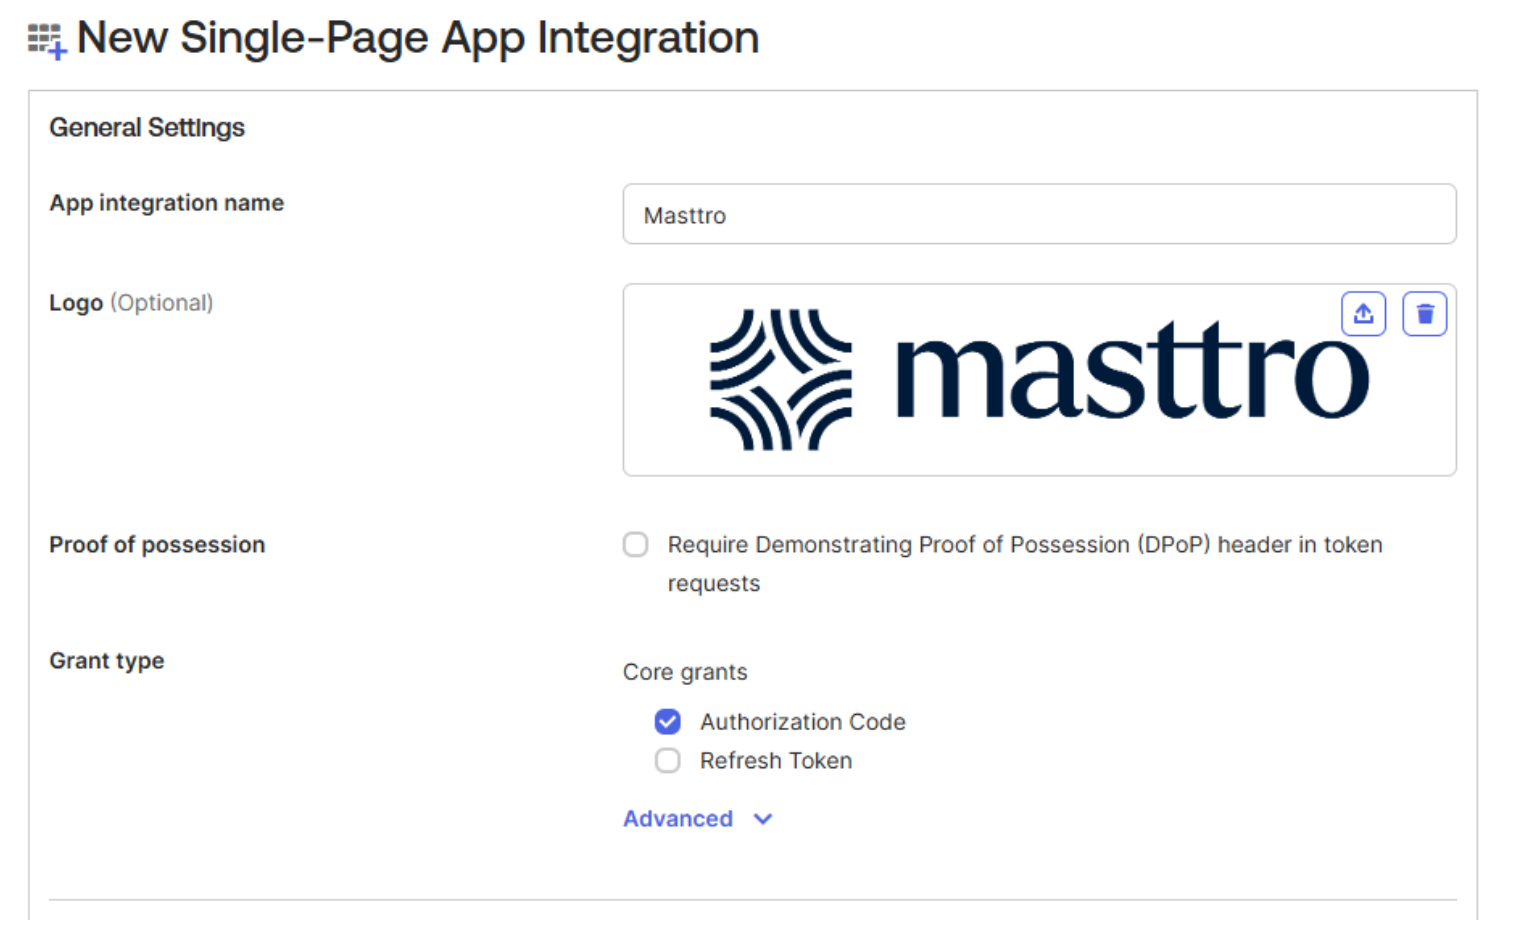
- App integration name: for example
-
Enter the URIs, in lowercase:
- Sign-in redirect URIs:
{{WEB_APP_URL}}/[instance]. If your users sign in to the Masttro phone or tablet app with SSO, click Add URI and also addstore.masttro.token://oidc/callback(phone) andstore.masttro.dfo://oidc/callback(tablet). If your users will connect AI assistants through the MCP server, click Add URI and also add{{MCP_SSO_REDIRECT_URI}}. - Sign-out redirect URIs:
{{WEB_APP_URL}}/[instance].
- Sign-in redirect URIs:
-
Under Assignments, choose who can use Masttro (everyone or selected groups), then click Save.
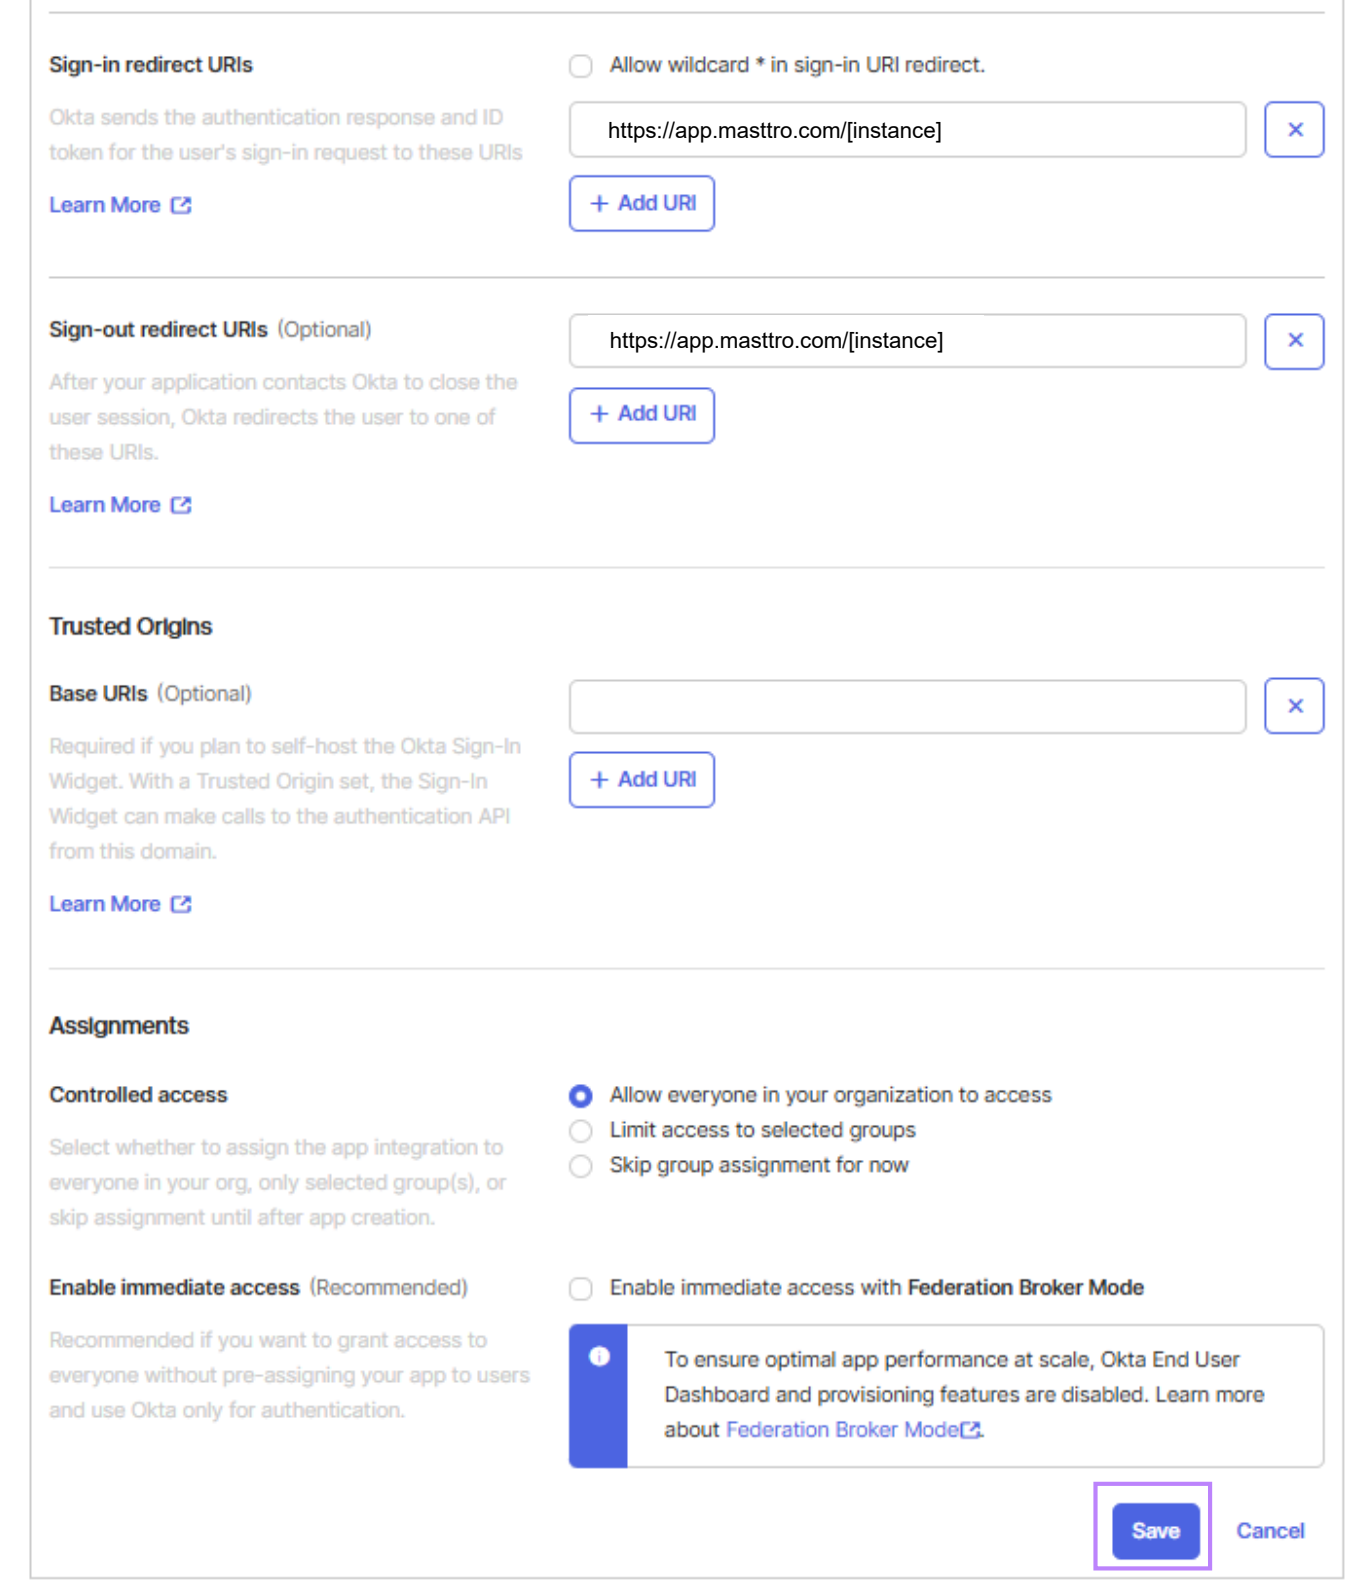
The screenshot shows only the web application URI. Add the mobile app and MCP URIs to the same sign-in redirect URI list if you need them.
Login settings
-
On the app's General tab, click Edit on General Settings.
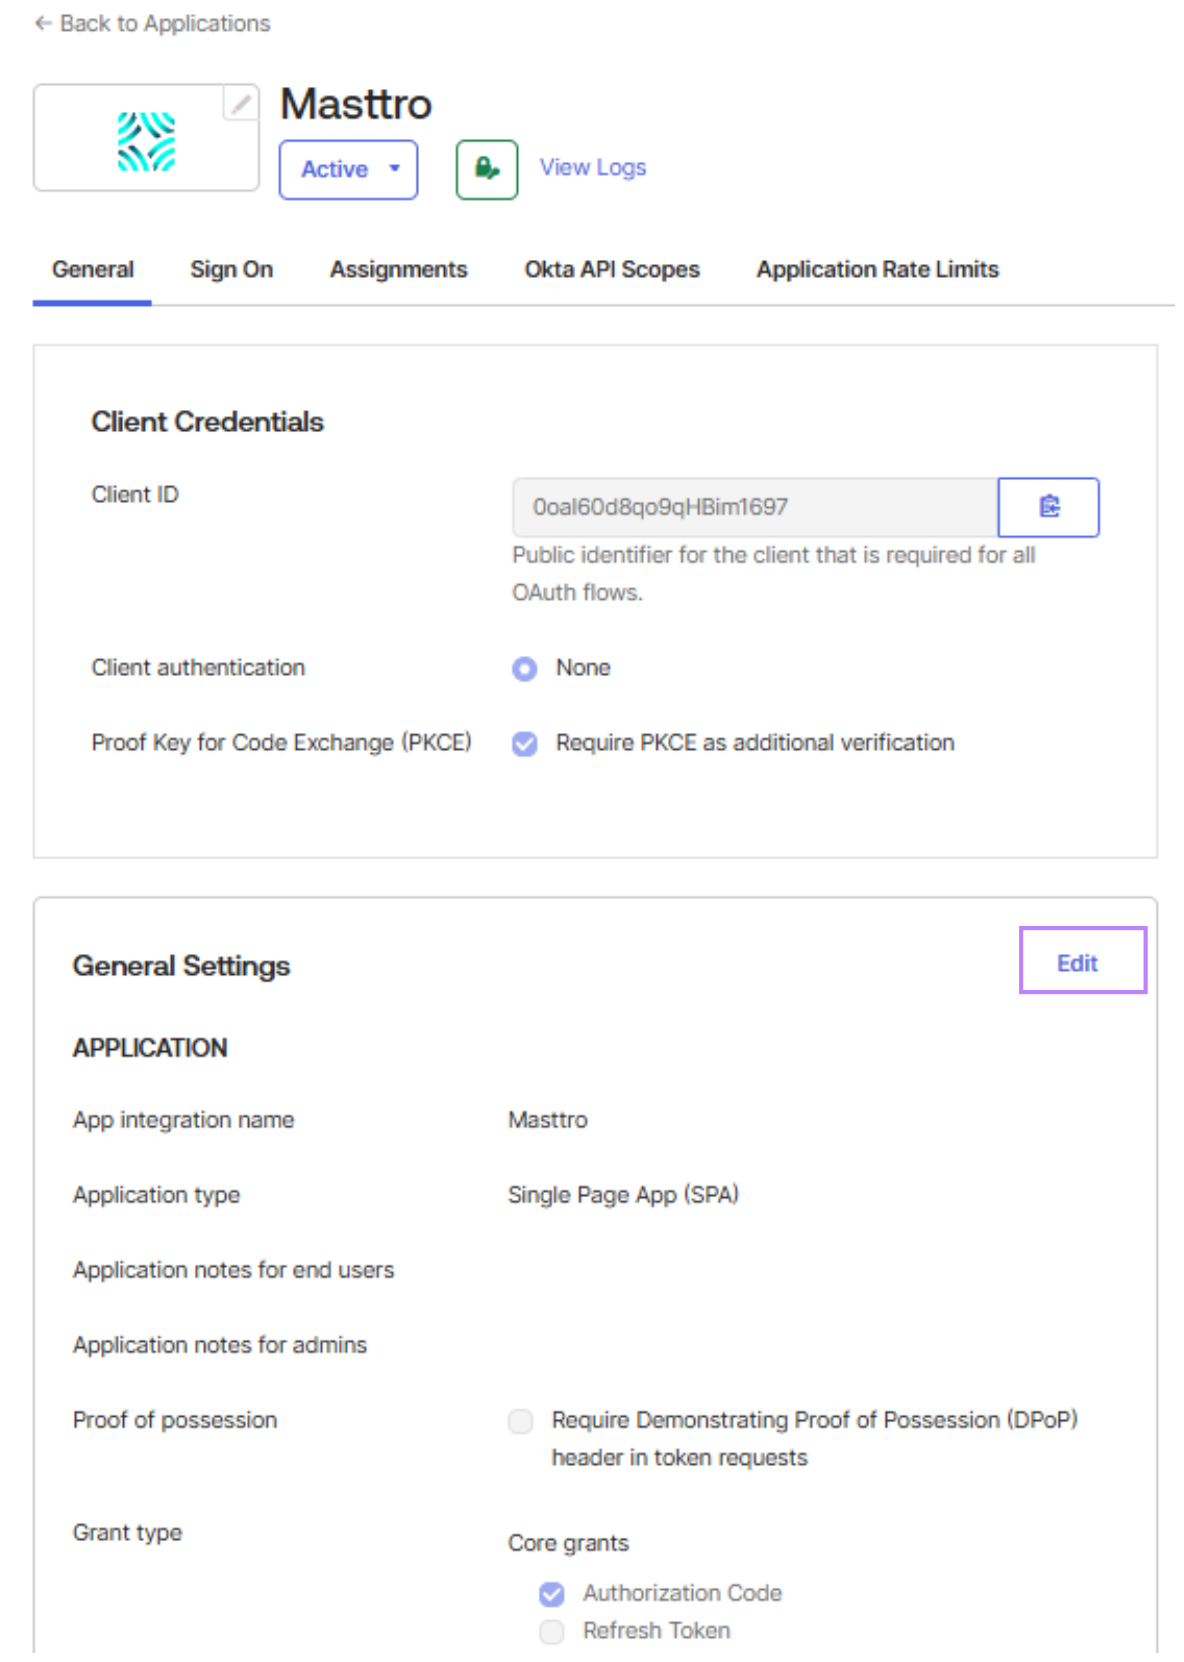
-
In the Login section, set Login initiated by to Either Okta or App, keep Login flow on Redirect to app to initiate login (OIDC Compliant), and set Initiate login URI to
{{WEB_APP_URL}}/[instance].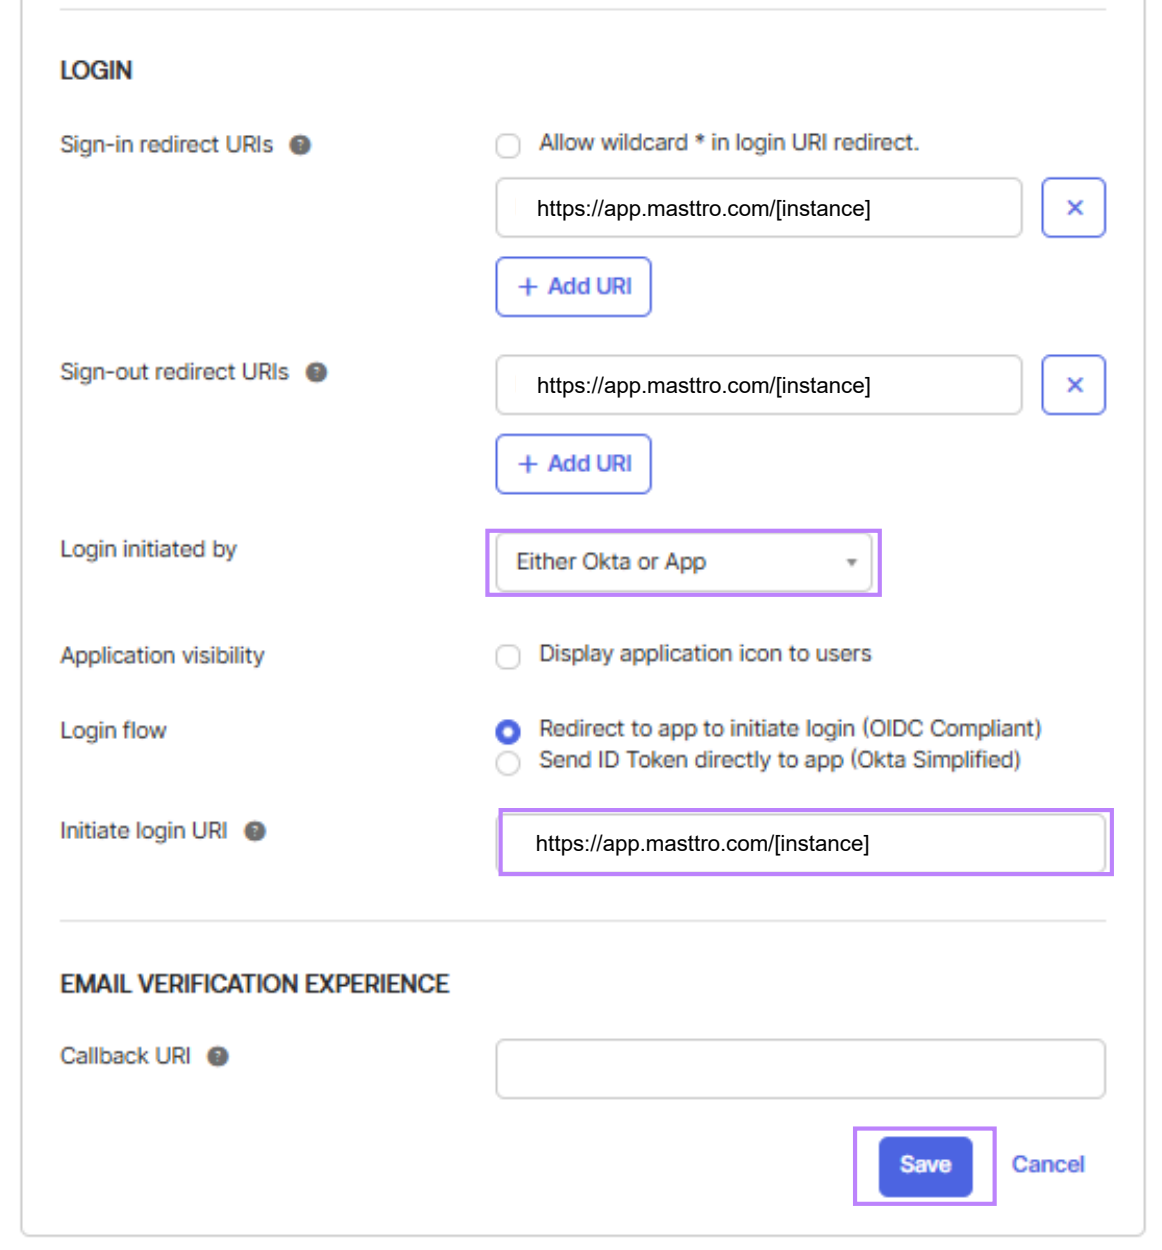
Click Save.
Add redirect URIs later
If you skipped the mobile app or MCP redirect URIs when creating the app, you can add them later: on the General tab, edit Login → Sign-in redirect URIs, click Add URI for each one you need and save.
store.masttro.token://oidc/callback
store.masttro.dfo://oidc/callback
{{MCP_SSO_REDIRECT_URI}}
The first two are the phone and tablet apps, the last the MCP server. They all go on the same Single-Page Application. You don't need a second app integration, and the web application isn't affected.
Send the values to Masttro
-
On the app's General tab, copy the Client ID. Client authentication should be None and Require PKCE checked.
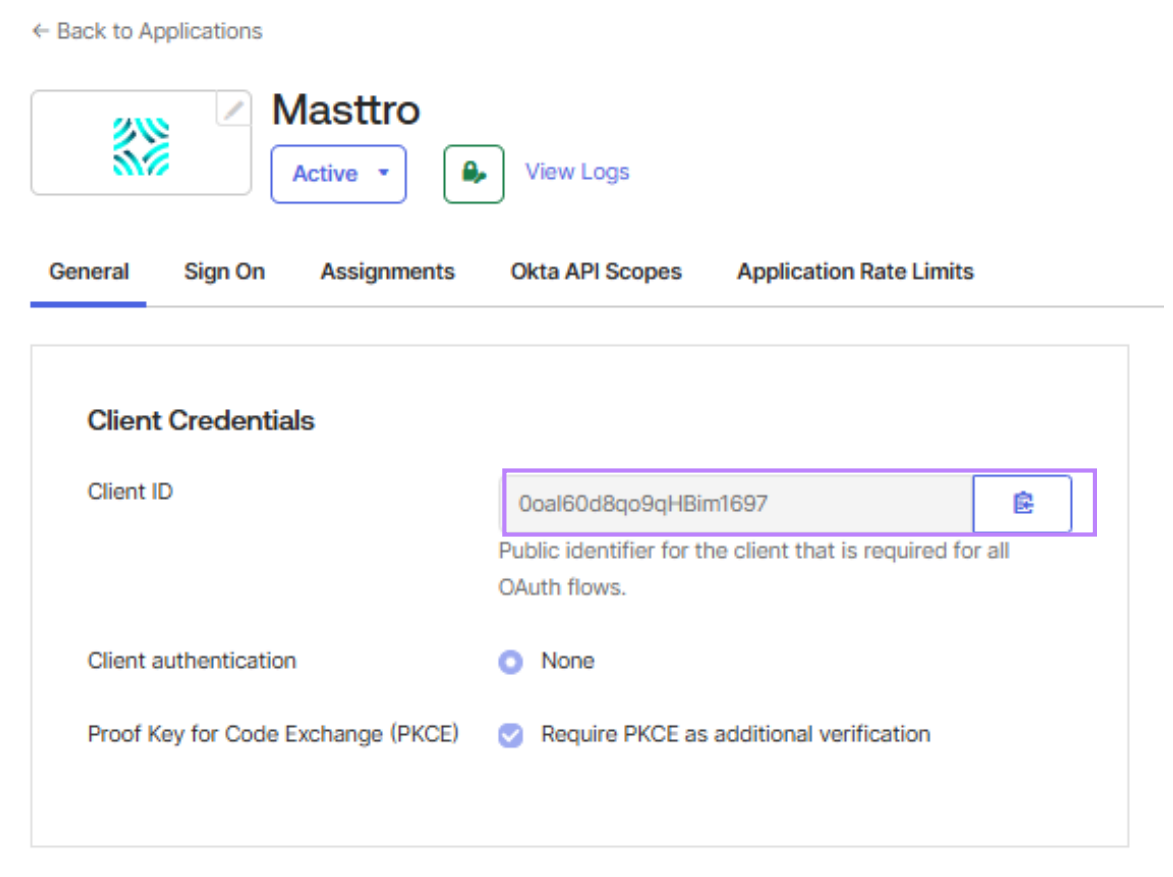
-
Open Security → API → Authorization Servers and copy the Issuer URI of the authorization server you use (usually
default).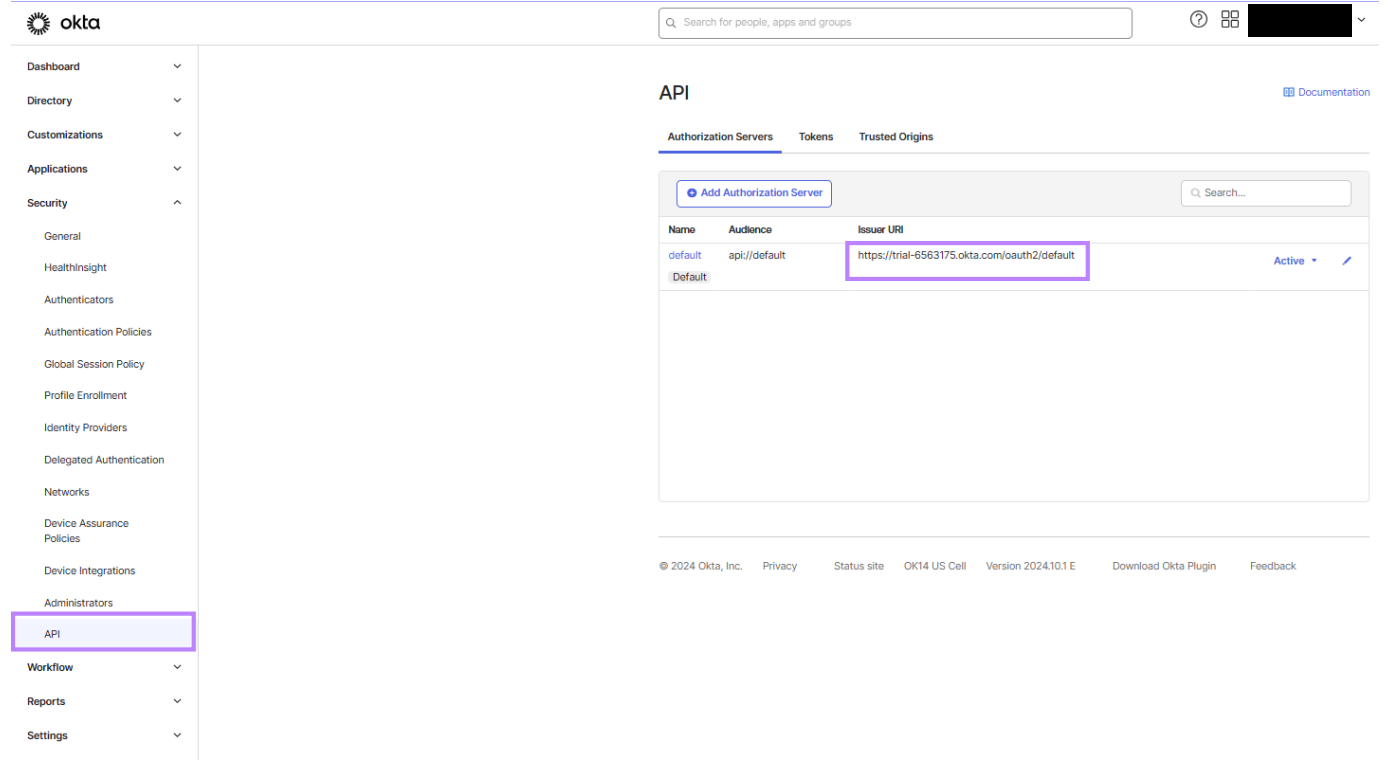
Send both values to your Masttro representative. Neither is a secret.
Masttro configures your instance and tests the sign-in with you. See Troubleshooting if something fails.