Microsoft Entra ID
Register Masttro as an application in your Microsoft Entra ID tenant (formerly Azure Active Directory). You need a role that can create app registrations, such as Application Administrator.
Register the application
-
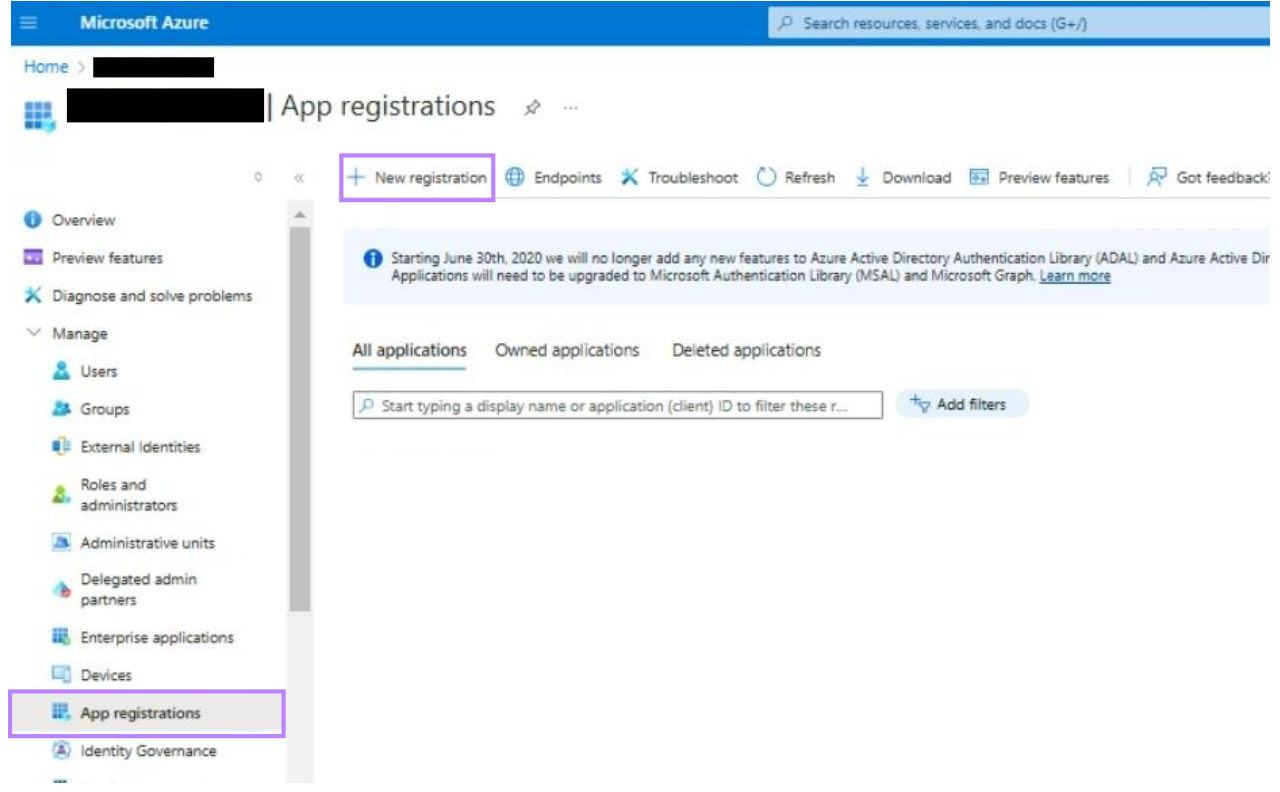
In the Microsoft Entra admin center, open App registrations and click New registration.
-
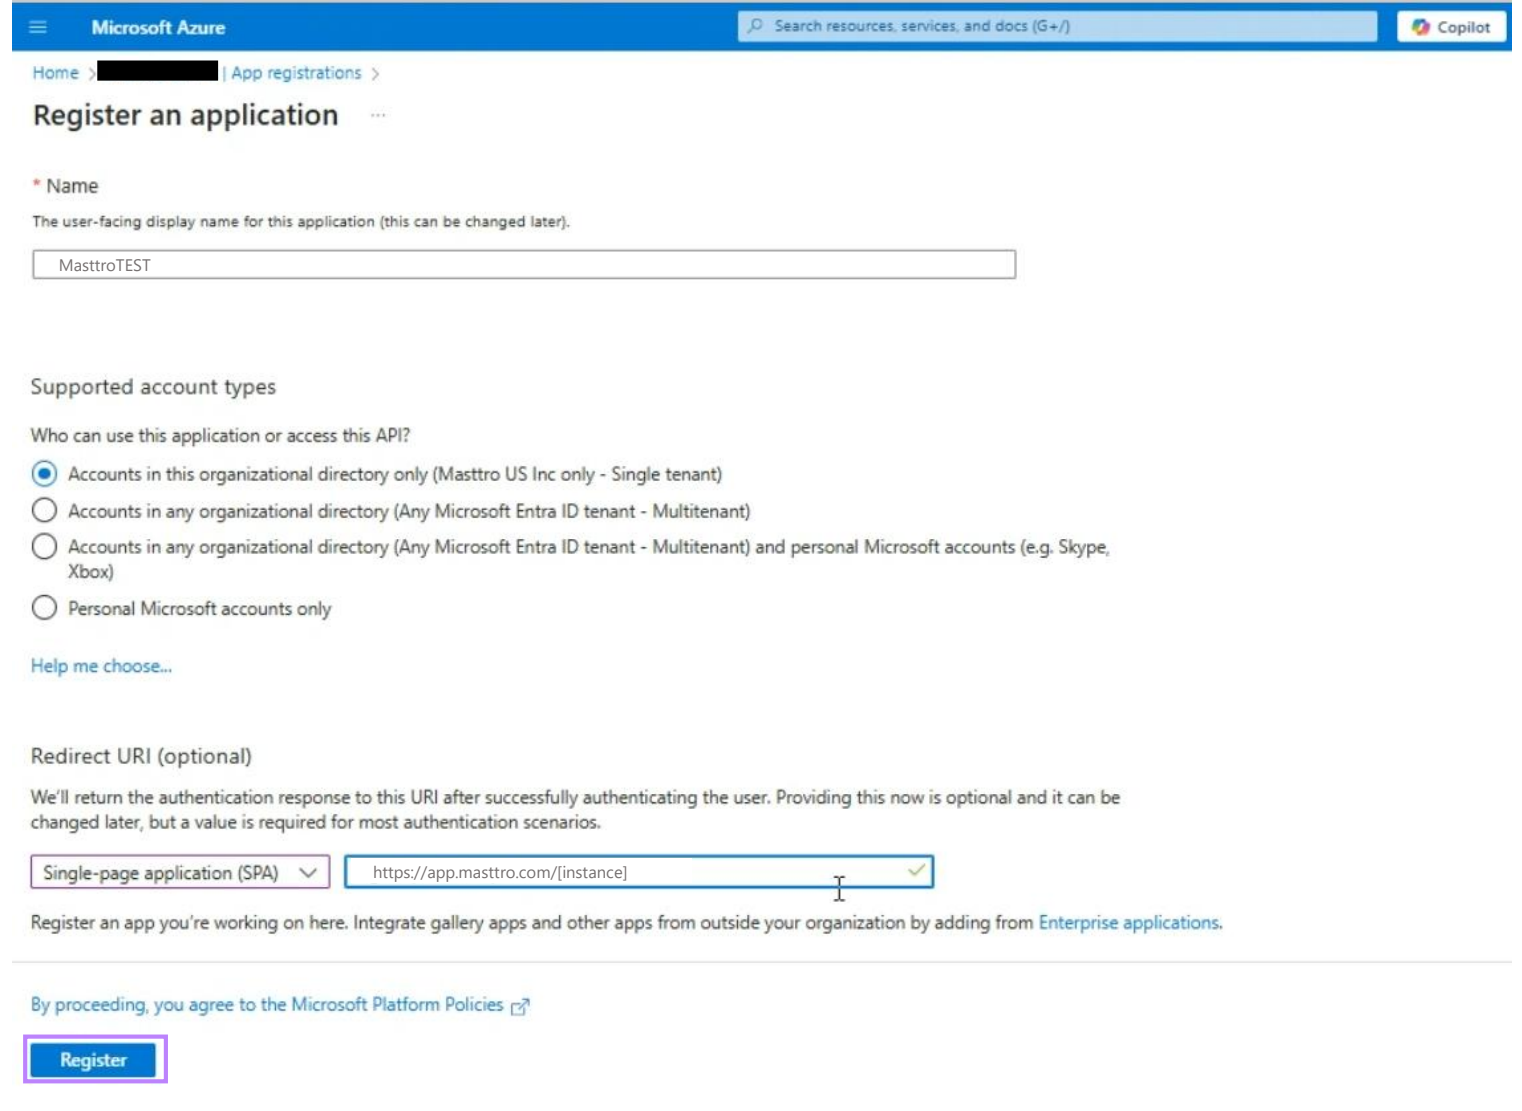
Fill in the registration:
- Name: for example
Masttro. - Supported account types: Accounts in this organizational directory only.
- Redirect URI: platform Single-page application (SPA), with your Masttro login URL in lowercase:
{{WEB_APP_URL}}/[instance].
Click Register.
- Name: for example
-
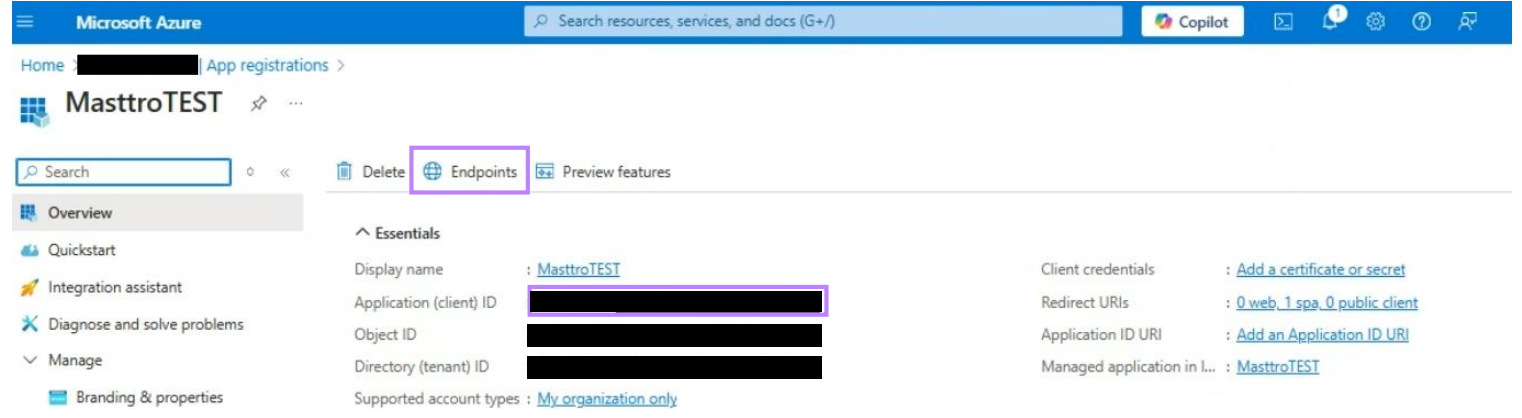
On the application's Overview page, copy the Application (client) ID.
-
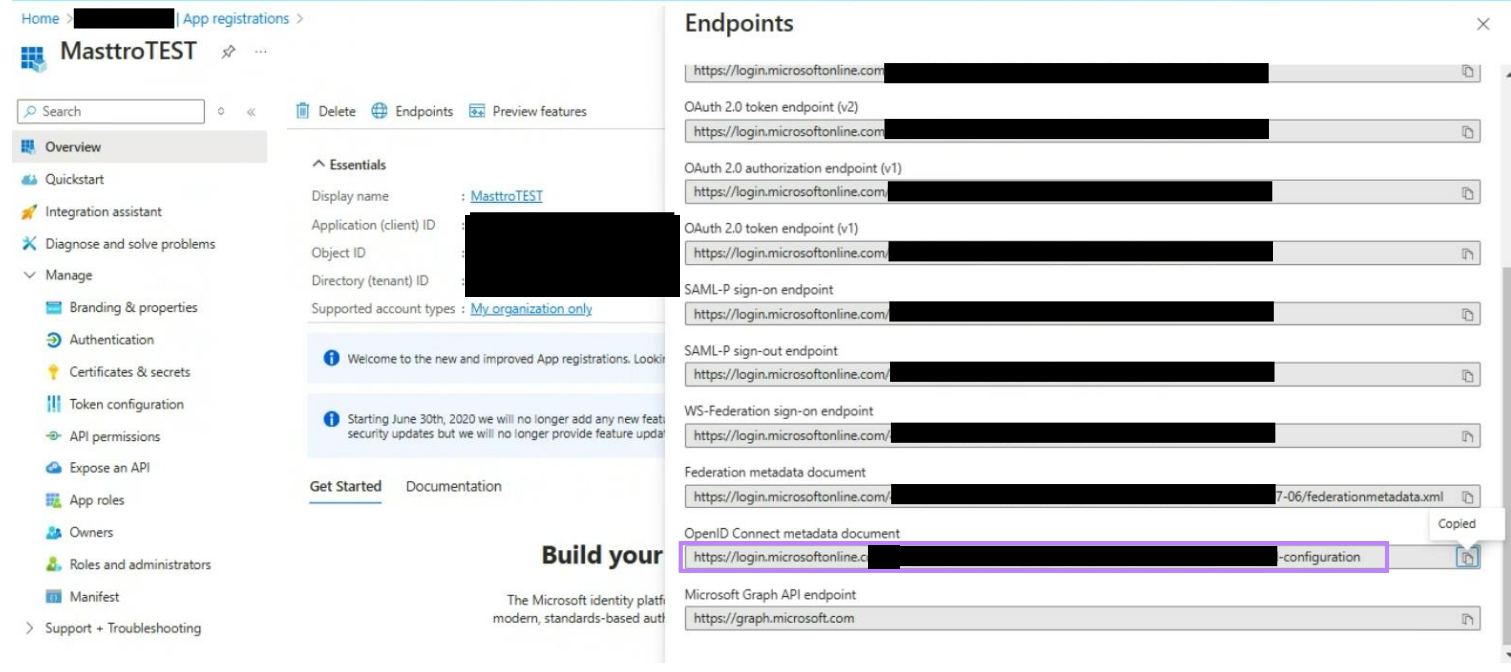
Click Endpoints and copy the OpenID Connect metadata document URL.
Add the email claim
Masttro identifies the user by the email in the access token.
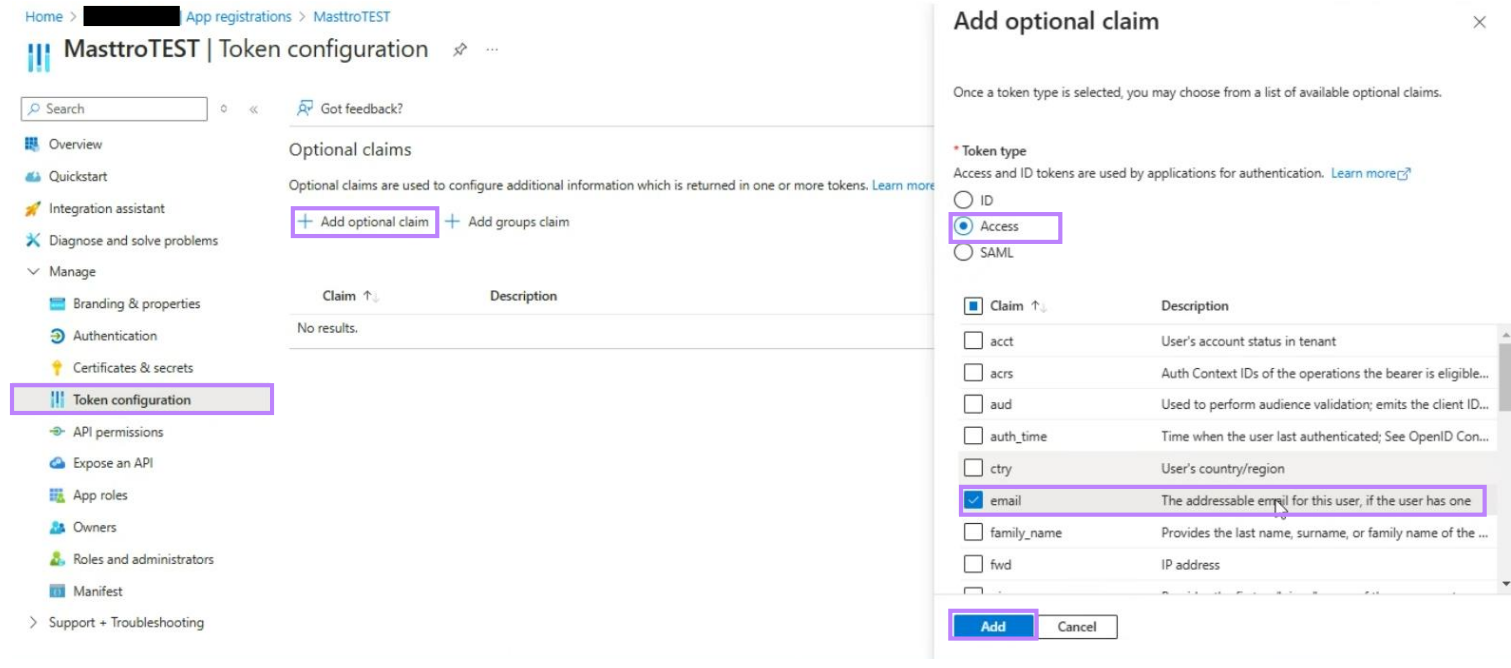
Open Token configuration and click Add optional claim.
-
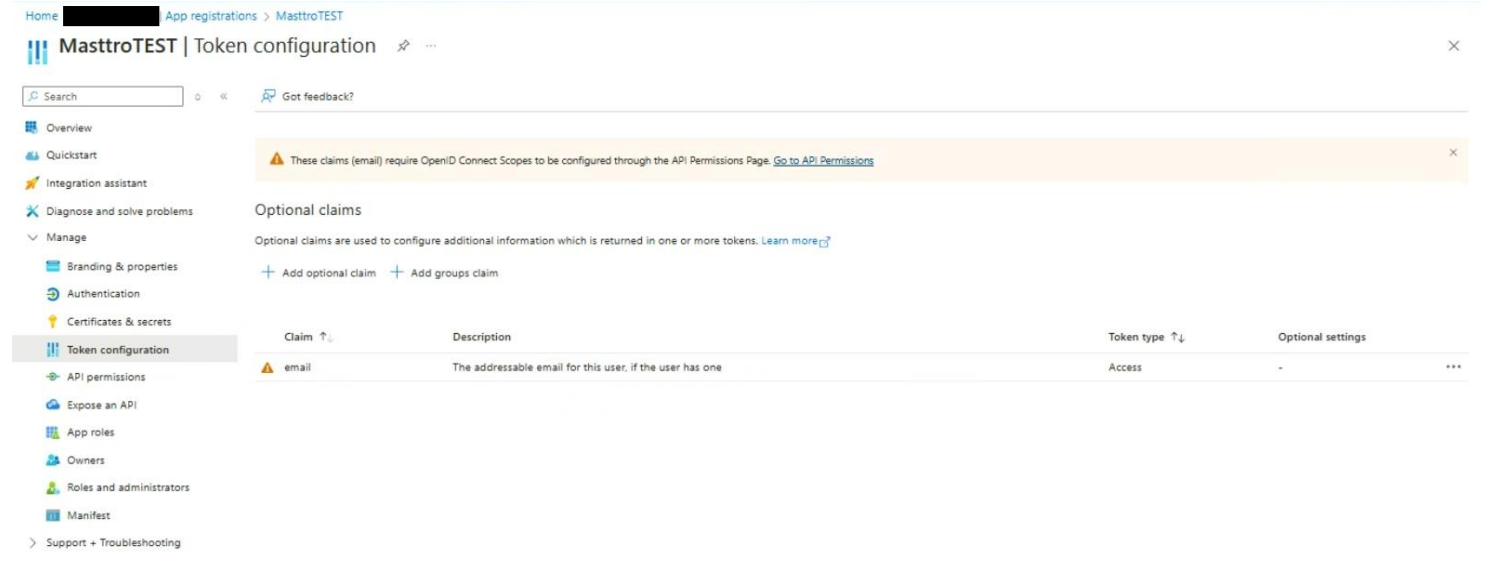
Select token type Access, check email and click Add. If Entra asks to add the Microsoft Graph email permission, accept.
The claim is now listed:
Expose an API scope
-
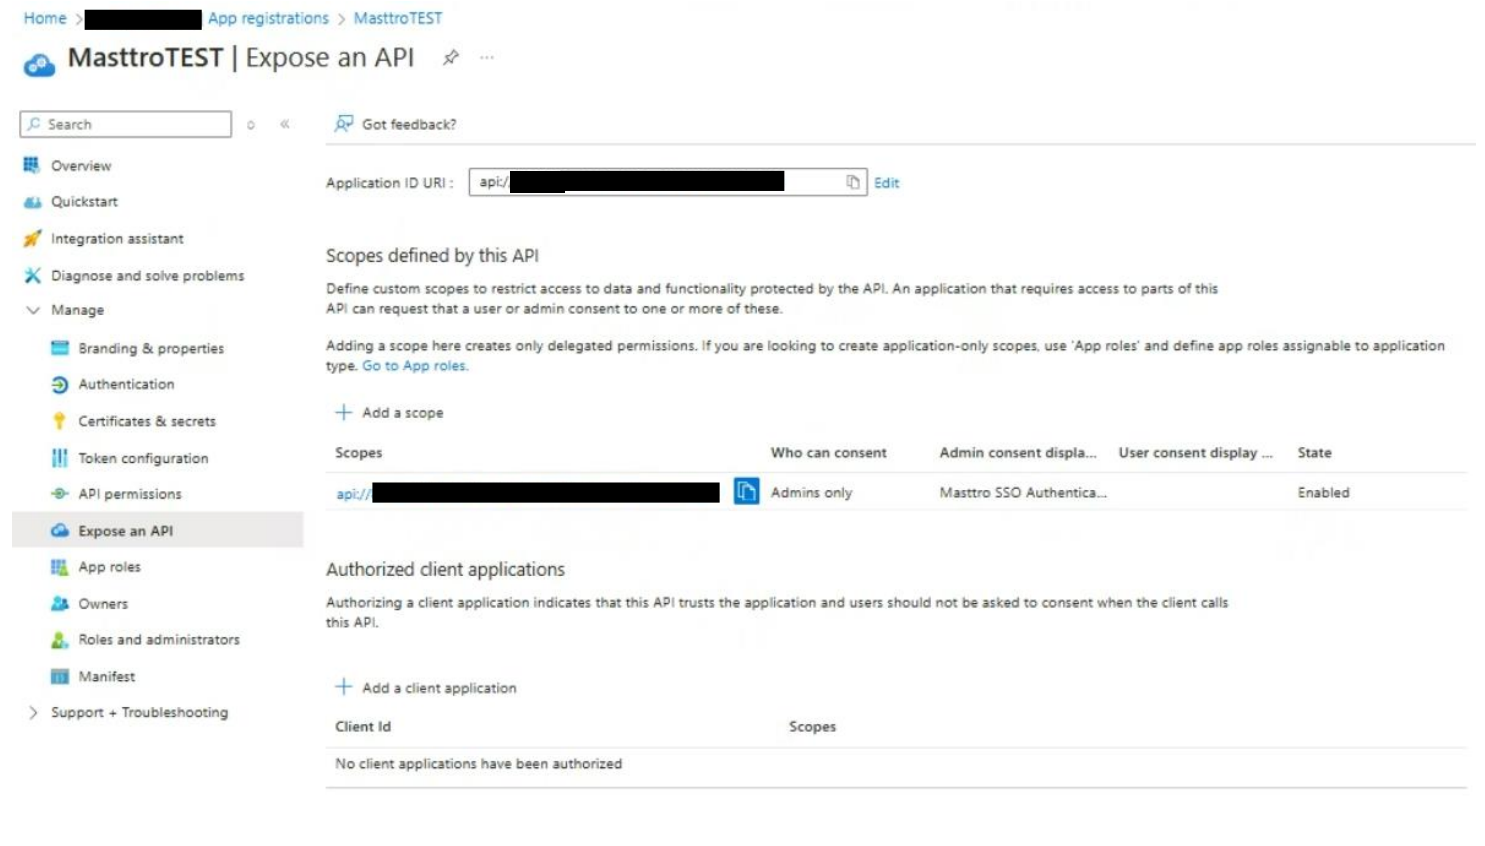
Open Expose an API and click Add a scope. Accept the suggested Application ID URI (
api://<client id>) and click Save and continue.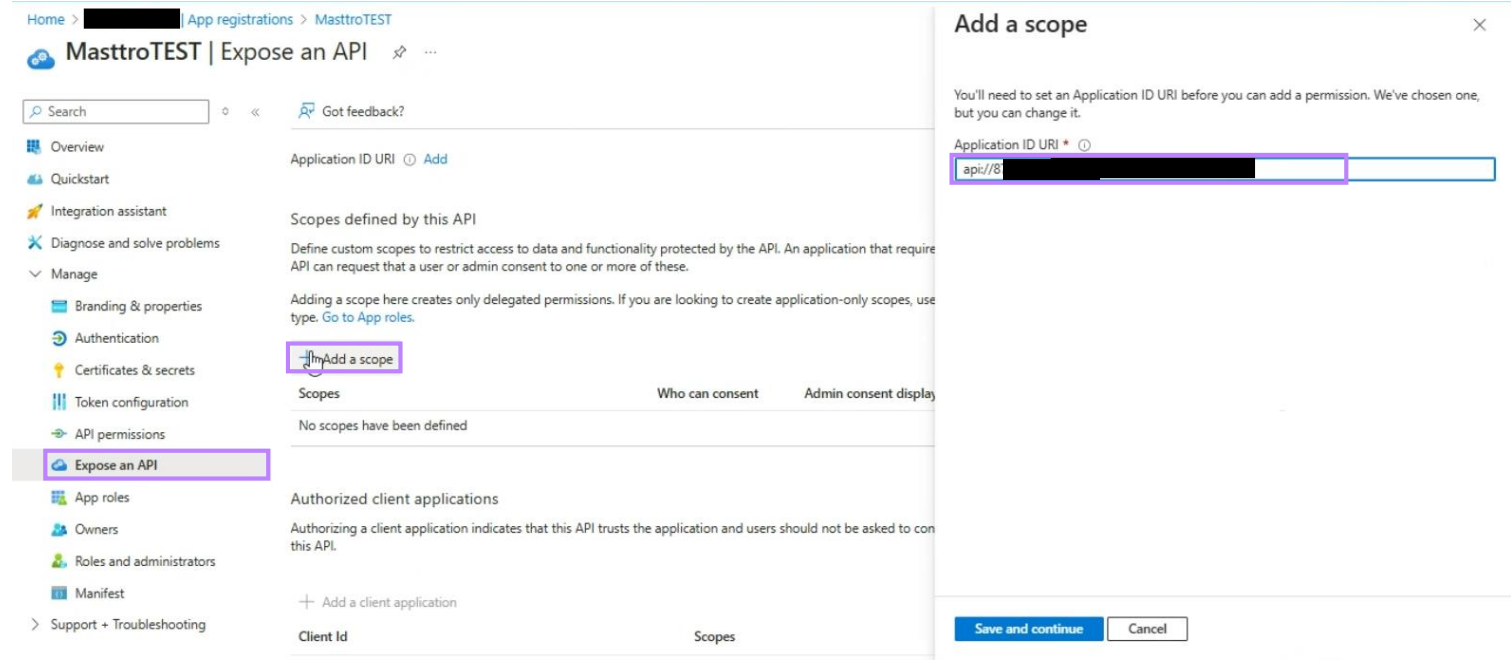
-
Enter a Scope name (for example
Masttro.SSO), set Who can consent to Admins only, fill in the admin consent display name and description, make sure State is Enabled, and click Add scope.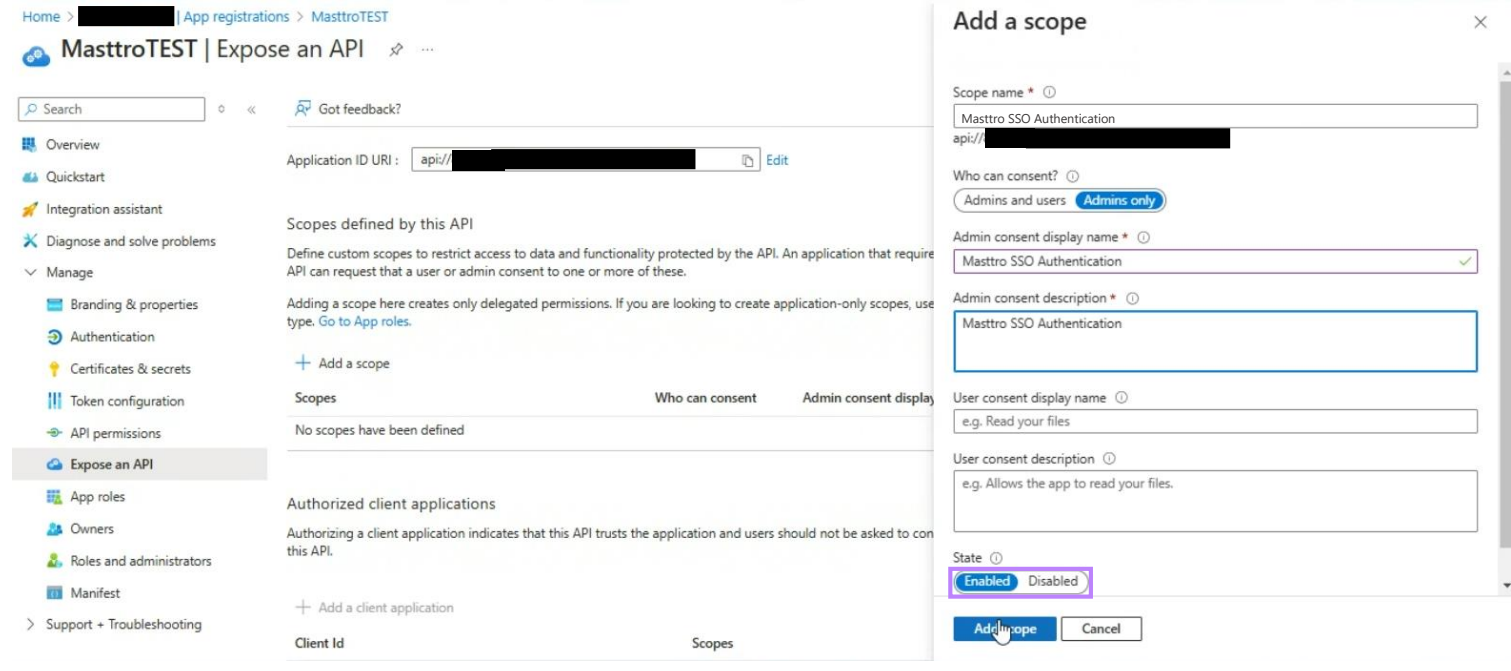
-
Copy the Application ID URI and the scope name.
Use v2 access tokens
Open Manifest. Under
api, changerequestedAccessTokenVersionfromnullto2: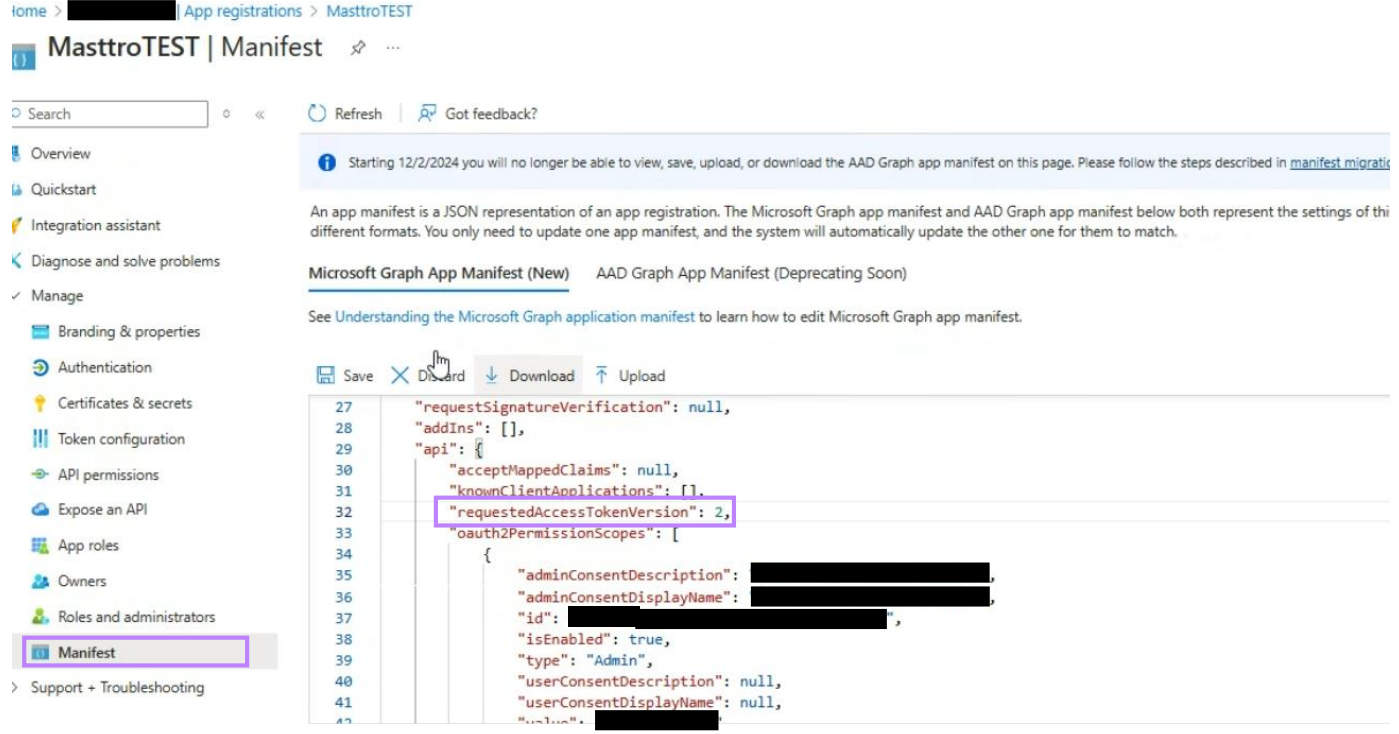
Click Save.
Allow the mobile app redirect URIs
Needed if your users sign in to the Masttro phone or tablet app with SSO.
Open Authentication and click Add a platform (or Add Redirect URI).
Choose Mobile and desktop applications, enter these custom redirect URIs and click Configure:
store.masttro.token://oidc/callback
store.masttro.dfo://oidc/callback
The first is the phone app and the second the tablet app.
Allow the MCP redirect URI
Only needed if your users will connect AI assistants to Masttro through the MCP server. It can be added at any time and doesn't affect the web application.
Open Authentication. If you already added the mobile app URIs, click Add URI under Mobile and desktop applications. Otherwise click Add a platform and choose Mobile and desktop applications.
Enter this custom redirect URI and save:
{{MCP_SSO_REDIRECT_URI}}
AADSTS9002327. Use Mobile and desktop applications, the same platform as the mobile app URIs.
Send the values to Masttro
Send these to your Masttro representative. None of them is a secret:
- Application (client) ID
- OpenID Connect metadata document URL
- Application ID URI
- Scope name
Masttro configures your instance and tests the sign-in with you. See Troubleshooting if something fails.